



In this case, the ko rule requires a player to wait at least one turn before recapturing the stone just played.
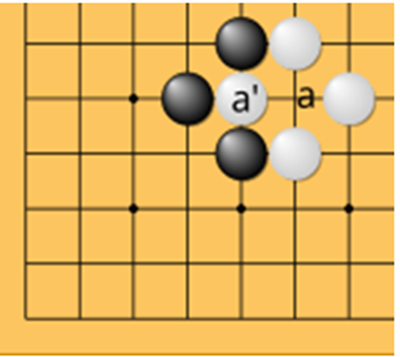
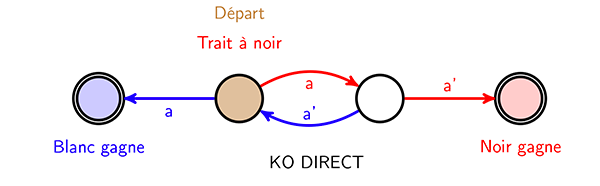
The diagram above shows a local position (there are a priori other stones elsewhere, as well as battles, threats, and so on). If Black captures the stone at a’ by playing at a, White cannot immediately play at a’, because the resulting position would be identical to the one in the diagram, with the same player to move—it would again be Black’s turn. White must therefore play elsewhere. If White considers capturing the stone at a’ important, they will make a threat known as a ko threat: a move that will cause damage to Black if ignored. If Black responds to the threat, White can recapture the ko by playing at a’, thereby reversing the roles. Black can also connect the ko by playing at a’.
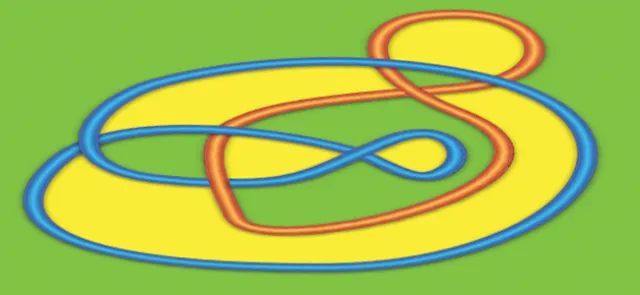
Here is the graph associated with this ko. The starting position is shown in orange. The final positions—in which the ko has been resolved in favor of either White or Black—are enclosed by double circles. Black’s "moves" are shown in red and White’s in blue.
Another example of a ko and a seki
-------------------------------------
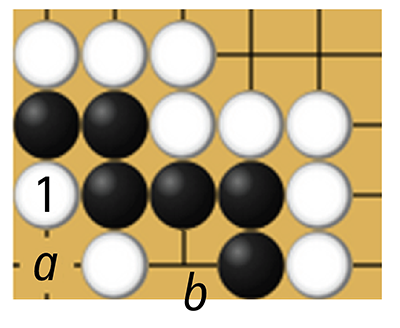
In the position above, White threatens to capture the black stones by playing at b. Black must make a ko threat elsewhere on the Go board. If White responds, Black will retake the ko at a, hoping to capture the second white stone by subsequently playing at b and thereby create two eyes. This position is called a direct ko favorable to White.
Now consider a position known as a seki (deadlock).
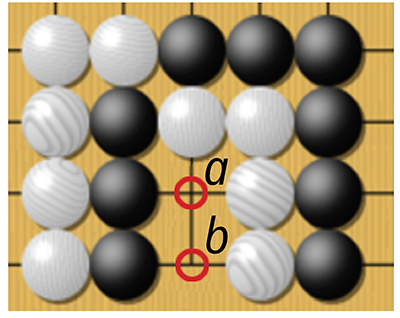
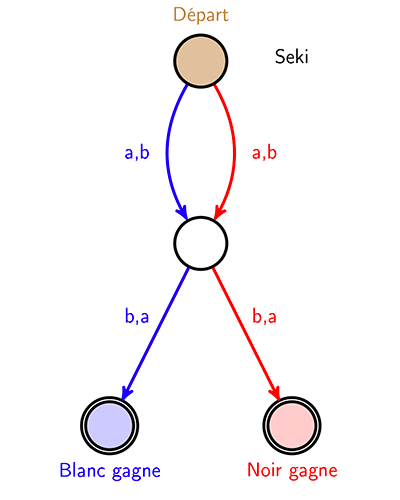
The two inner chains, one black and one white, each have two shared liberties at the intersections a and b. Locally, neither player has any reason to occupy either intersection, since doing so would allow the opponent to capture their stones by occupying the other one. The position therefore usually remains unchanged.
Reference: Kos and Their Graphs in the Game of Go, an article on the Fédération française de go website, available online.